So now, we’re going to go back and revisit the equation I brought up a while back:
Using the energy costs we determined in the previous blog post, we can now finalize this equation. One important thing to note is that we are doing this for 1kg of material over 1000 cycles.
As shown in the chart, silica gel is the most cost-effective material in low-humidity environments—and in most other humidity levels too. This means it captures water at the lowest overall cost compared to the other materials I tested. There was one exception: in powdered form and low humidity, blue silica gel came out slightly ahead.
Overall, the data is clear—silica gel, especially in beaded or powdered form, tends to be the most cost-effective option across a range of humidity levels. This contrasts with my earlier results, where activated alumina appeared to be the most cost-effective before factoring in energy costs. That difference highlights how important energy costs can be when evaluating the overall efficiency of an atmospheric water capture system.
I know this involves a lot of data, so if anything was unclear or you want me to break something down further, feel free to drop a comment below!
When we compare materials like zeolite and silica gel, most discussions revolve around adsorption capacity, lifespan, or cost per kilogram. But one factor often gets overlooked—and it’s one that can silently drain your budget over time: energy consumption during regeneration. Regeneration in this case means driving off the water that was captured to ensure that the material can be used again.
In many real-world applications, desiccants are repeatedly heated to drive off adsorbed moisture. This heating step adds up, especially across hundreds or thousands of cycles. So how much does it actually cost to regenerate 1 kg of desiccant over 1,000 cycles?
Let’s find out.
Zeolite 13X Heating Cost Estimate (1,000 Cycles at 275°C)
Assumptions:
Mass of zeolite: 1 kg
Temperature increase: 25°C to 275°C → ΔT = 250 K (regeneration temperature determined off of journals)
Specific heat capacity: 943–1344 J/kg·K (sourced from journals)
Heater power: 400 W (0.4 kW)
Heater efficiency: ~60%
Electricity cost: $0.1085 per kWh (Tempe Electricity Cost)
1. Energy Required per Cycle (Ideal):
Energy = c × m × ΔT
= (943 to 1344) × 1 × 250
= 235,750 to 336,000 J
= 0.23575 to 0.336 MJ (1MJ = 0.277778 kWh)
= 0.0655 to 0.0933 kWh
2. Adjusted for Heater Efficiency (Actual Energy Draw):
= 0.0655 to 0.0933 kWh ÷ 0.60
= 0.1091 to 0.1555 kWh
3. Cost per Cycle:
= 0.1091 to 0.1555 kWh × $0.1085
= $0.0118 to $0.0169
4. Total Cost for 1,000 Cycles:
= $0.0118 to $0.0169 × 1,000
= $11.80 to $16.90
Silica Gel Heating Cost Estimate (1,000 Cycles)
Assumptions:
Mass of silica gel: 1 kg
Temperature increase: 25°C to 77.5°C (ΔT = 52.5 K)
Specific heat capacity: 800–1100 J/kg·K
Heater power: 400 W (0.4 kW)
Heater efficiency: ~60%
Electricity cost: $0.1085 per kWh
1. Energy Required per Cycle (Ideal)
Energy = c × m × ΔT
= (800 to 1100) × 1 × 52.5
= 42,000 to 57,750 J
= 0.042 to 0.05775 MJ (1MJ = 0.277778 kWh) = 0.0117 to 0.0160 kWh
2. Adjusted for Heater Efficiency
0.0117 to 0.0160 kWh ÷ 0.60 = 0.0195 to 0.0267 kWh
3. Cost per Cycle
0.0195 to 0.0267 kWh × $0.1085 = $0.00212 to $0.00290
4. Total Cost for 1,000 Cycles
$0.00212 to $0.00290 × 1,000
= $2.12 to $2.90
That was a lot of numbers—but one thing is clear: silica gel is nearly 5x cheaper than zeolite in terms of energy cost alone. However, this isn’t the whole story. While silica gel is cheaper to regenerate, zeolite can capture significantly more water per kilogram, potentially offsetting the higher energy expense.
In our next blog post, we’ll dive deeper into that tradeoff: Does zeolite’s superior adsorption capacity justify its higher regeneration cost? Stay tuned as we unpack which material truly delivers the best value per drop of water removed.
This week at PAM, I continued my progress on the catalog. I did the usual tasks like taking photos and filling in all the necessary data fields, but a few challenges popped up.
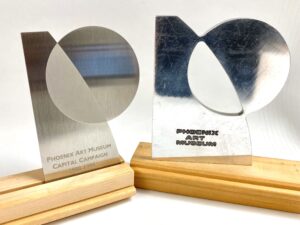
The first problem I encountered was when I needed to catalog some awards and plaques. The metal awards were very shiny, so I could see myself as well as the cabinets in the background reflected in the photographs. To cover the cabinets, I took a big grey board and propped it up using my chair. Then, I held the camera slightly to the side so the photographs would not show my reflection.
The setup where I put a board on my chair to block the cabinetsThe final picture of the metal awards
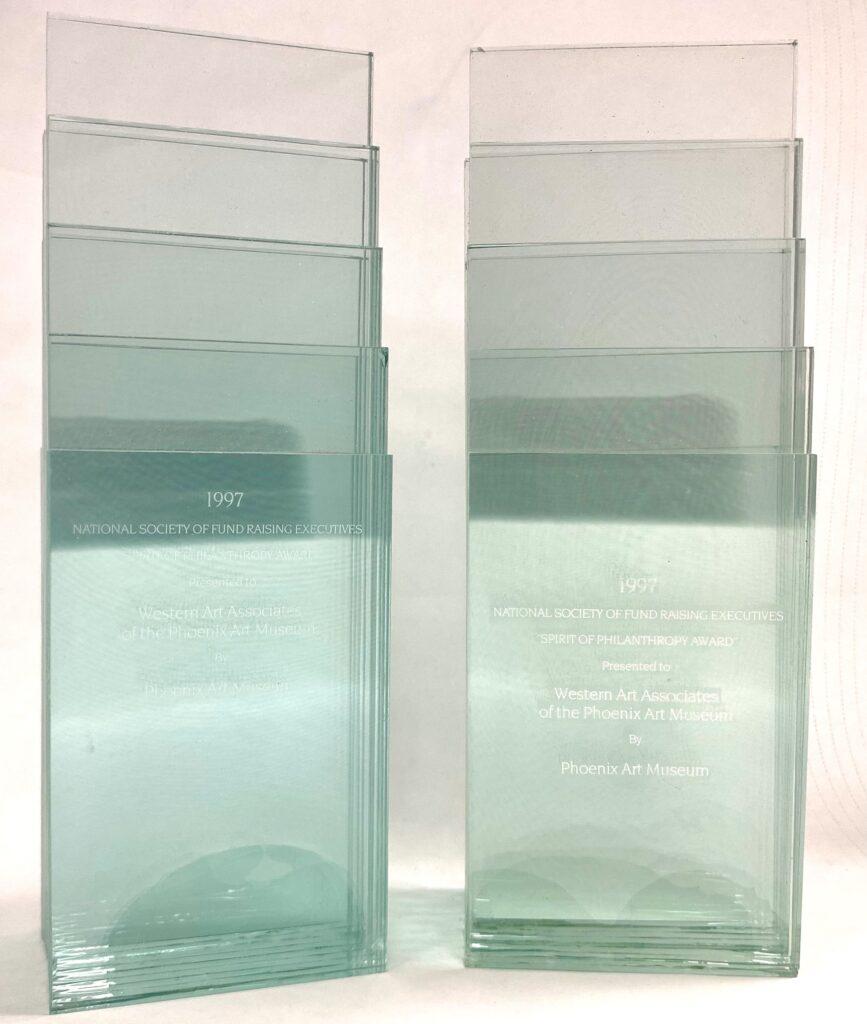
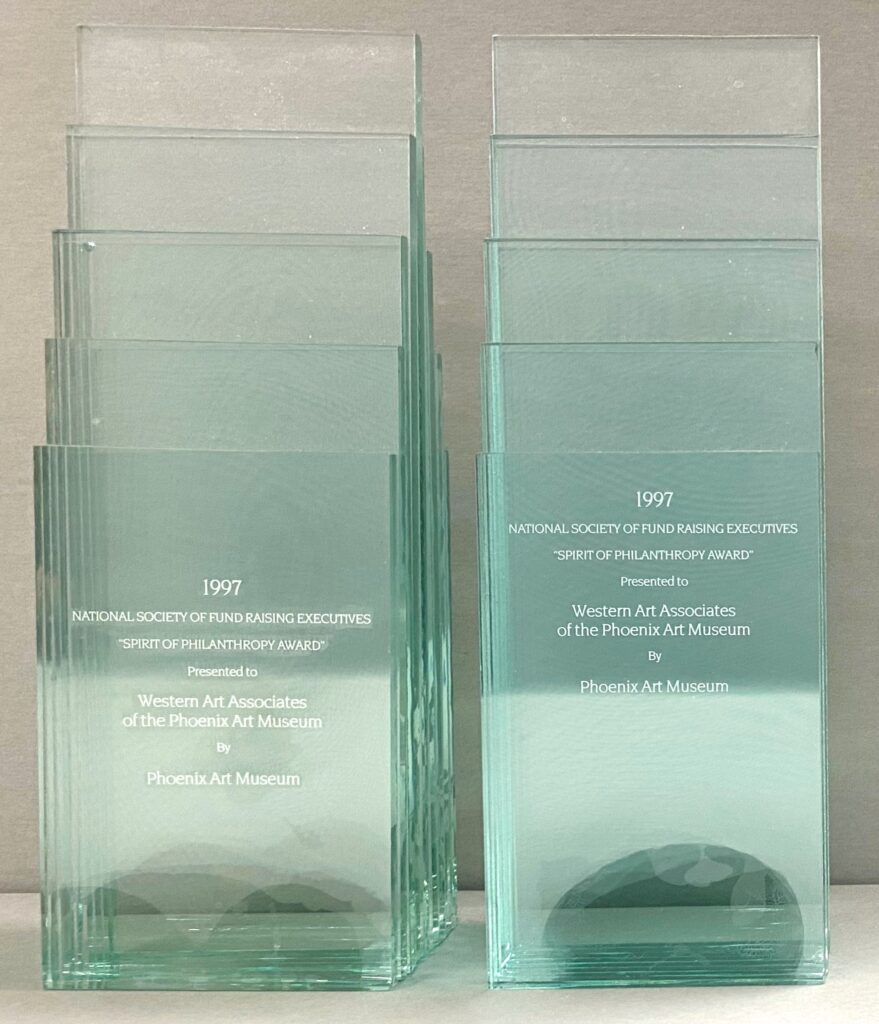
This same problem showed up with the glass awards, and in addition to that, the lettering on the awards were white so they blended with the white paper I was using for the background. I flipped a box around and created a new setup where the background was grey instead.
The old setup with a white backgroundA picture of the awards with the white background. The words are hard to readThe new setup with a grey background I came up withFinal picture with grey background
Since my setup was on a table, I had to do things like squatting down or leaning over the table in odd poses to make sure my reflection stayed out of the pictures. I felt a little crazy and was glad no one walked in to see me.
But, that was not the only time I felt a bit insane this week. After cataloging all of the awards, I moved on to textiles. My mentor had done two T-shirts for the initial catalog examples, so I followed her guide. We laid the T-shirts flat on a grey board and took photographs from above, adjusting the lighting as needed. One of the shirts had pictures of four different pieces of art on the front, and my mentor told me the names of three of them to put in the description. Yet, she could not remember the name of the third piece from the left.
The shirt in question
I was a bit disappointed that my description of the T-shirt in the metadata had the titles of the pieces and the names of the artists for only three out of four paintings, so I took matters into my own hands. The style of the painting was Chinese, and it had to be a part of the museum’s collection – otherwise it would not be on the shirt in the first place. I got permission to go back to Piction Discoverer (where there is a record of all the items in the museum’s fine art inventory); however, I found that the filtering system on the website was not functional. Powered by my determination and refusal to give up, I opened the folder of all the items in the Asian category and manually flipped through the 68 pages of 1700+ items with only the low-quality picture on the T-shirt to guide me.
I doubted that anyone would appreciate my efforts, but those thoughts did not stop me. Even if I could not find it, I was already happy for the opportunity to browse the museum’s inventory some more. Eventually, I did find the name and artist of the painting: Zhang Daqian’s “Autumn Flavors”, a Chinese ink painting on paper.
The thoughts about craziness this week made the song “CRAZY” by LE SSERAFIM pop into my mind, and I incorporated their lyrics “act like an angel, dress like crazy” into my blog title while changing “dress” to “catalog” so it made more sense. Their song is about having fun and being confident even when the world thinks you are going crazy. Like their message, I just need to have more confidence that my work is good and carry on.
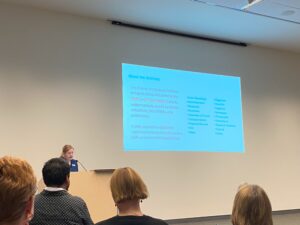
Finally, there was a special event on April 7th where my mentor did a presentation on the archives. I got to sit and watch, and I even went early to see a presentation by Dr. Mary Hogan Camp, an independent art historian. Her presentation was about Belle da Costa Greene, a librarian who worked at the Morgan Library in the 1900s. It was very interesting to learn about Greene’s life, and I now hold a deep respect for her.
The audience was made up of docents, volunteers, and people interested in art and museums. A docent is a person who teaches others, and museum docents in particular work as tour guides and teach visitors about the history of the museum and the context behind artworks.
Here is a few words to describe the docents:
Doing magnificent work
Our precious museum volunteers
Carrying a vast library of knowledge
Ever so eager to share their tales
Never stopped learning
Teaching others very well
So the spirit of the museum is preserved
I was very excited to be surrounded by a large number of people who were interested in the museum and its workings. I also had a lot of fun learning from the docents about other docents, and I am glad I went to the event.
A picture of the eventMiss Aspen presenting on the archivesMiss Aspen presenting on the gallery we worked on together
Next week, I am going to continue the catalog. I still have some more T-shirts to input information for, and I look forward to tackling any problem they could possibly throw at me.
If I’m being honest, nothing really happened this week. It’s mostly because I went on a college tour this past weekend, so I missed out on most of the days to work at my internships. But besides that, nothing new happened otherwise. I just continued making progress on my group’s research paper, and they finally started contributing to it too. I did download a new program called Stellarium, which allows me to simulate the night sky at different locations and times under different weather conditions. It’s helpful for predicting what will be in the night sky and where it will be exactly.
I don’t even have a picture to share this week because I never got the chance to go out and do work, sorry.
Hello everyone, and welcome back to this week’s blog post!
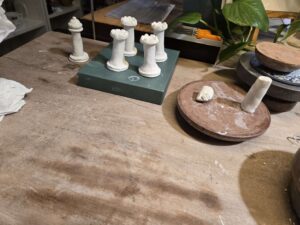
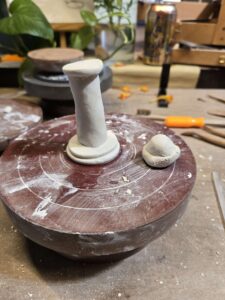
Over the past week, I worked on making more chess pieces as well as finishing the board. To start the week, I went to my site placement to work on the pieces. I had already made one rook, but its body wasn’t uniform because I didn’t have a method to make the pieces look similar. My mentor then showed me a way to standardize the bodies: I could roll out the clay and cut out multiple bodies at a time. This method ensures the pieces look mostly the same. Using this approach, I cut out the body of my first rook to reuse the top and bottom. Then I was able to finish making the four rooks needed for the final set.
For the queen, the process was quite similar, except that it is slightly taller and has a different top. For the top, I took a ball of clay, placed it on a flattened ball of clay, and folded it up. I used a smoothing tool to make the top look somewhat like a crown, then added a smaller ball on top to finish it. After completing the first queen, I tried to replicate it, but I couldn’t quite remake the top. Since I had to leave soon, I repurposed the piece into a king. To do this, I added a few layers to the top and placed a cross at the very top.
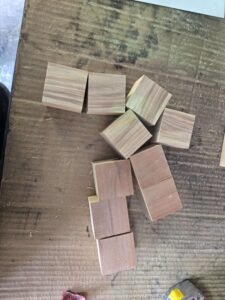
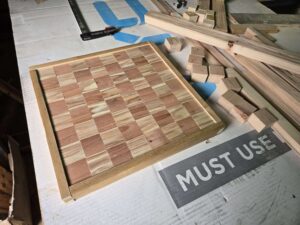
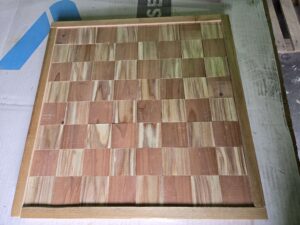
Later in the week, I revisited the board and began working on the final parts of it: the board itself. Originally, I had planned to use cheaper wood, but my father suggested using more expensive, nicer-looking wood instead. The woods we found were beautiful, but none of them were thick enough to match the height of the board. Then, just as I was about to settle for the cheaper wood, we found some redwood. It was more expensive but looked significantly better. We spent some time searching through the wood pile to find two good 8-foot 2x4s, and eventually, we did. Most pieces were either entirely red or just white, but we found a few that were special—they were light on one side and dark on the other, with the light side featuring some amazing patterns. On the board, each block even resembles Jupiter a bit, which I loved.
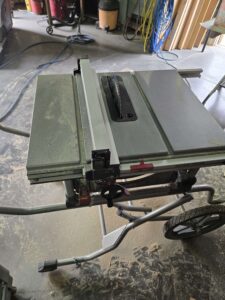
Turning the 2x4s into 2×2-inch blocks required ripping the wood so the width would be reduced to 2 inches. On some test runs with different wood, the blocks always turned out slightly too big. The interior of the frame measured about 16 ⅛ inches, which made cutting the blocks a bit tricky. We had to cut the wood to precisely 2.015 inches using a table saw. To achieve this size, we used a digital caliper for exact measurements down to the thousandth. Thankfully, most blocks ended up really close, with some being right on the 2.015-inch mark. However, there were still slight variations in size, and when placed into the frame, these differences caused the frame to come apart slightly. So, I went back to sanding all 64 blocks. This time, I used a disk sander, which made smoothing and slightly reducing the sides of the blocks much easier.
Now, with everything coming together, I’m really happy with how the board looks. All that’s left is to glue the blocks together and add a sealant or finish to the board. I’m excited to see the final result! See you all next week!
I would once again like to welcome you to my blog post, pathogenic partisans. Yet again, I have had another insanely productive week. I would even consider this week to be my most productive so far. And yes, the title is correct. I have finally got my game to the point where I can start playing it on a table, rather than just in my own head (yes, I do live a sad life).
I accomplished so much this week primarily because throughout previous weeks, I have been refining my processes. The biggest refinement I have made was in cutting out game pieces so that I was able to cut out cards, tiles, and statuses with absolutely wicked efficiency (while skipping multiple meals). I also have been able to complete artwork significantly faster because I am becoming more familiar with Procreate. The artwork is also getting a lot better and I have finally started getting a sense for color selection.
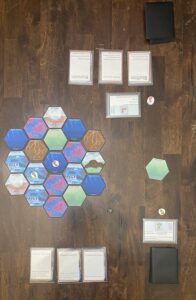
I ended up cutting out 40 environment tiles (4 copies of each), 500 tokens (100 of each type + 10 for each bacteria type), 212 gene and disaster cards (4 copies of each), and 10 bacteria cards (1 of each). About half of the tokens I have a just squares but the rest are fully completed circles. The gene and disaster cards ended up not quite being the correct size but through printing the bacteria cards again, I learned that I need to turn scaling to 1.1x on Tabletop Creator Pro. By far, I was most proud of the environment tiles, which look absolutely marvelous. Cutting out each one was a delight, firstly, because I love hexagons and secondly, because I loved seeing how the artwork printed. By printing and cutting all of these components, I was finally able to playtest my game.
Playtesting went about as well as you would expect for a new game; it crashed and burned. I spent the majority of the game removing tokens, placing tokens, and doing math rather than actually enjoying the game. After this first game, I changed around some of the rules to limit the amount of math necessary to play the game. I also clarified a lot of the rules on my gene cards and guide to make things simpler. On the second playtest, which is ongoing, I ended up replacing the glucose tokens with 20-sided dice so that I didn’t have to keep removing and placing tokens. It is a blessing that I played Magic previously because I have used 21 20-sided dice so far (there are 4 players). I’ll have to keep playing to see any other improvements I need to make.
Playtesting also helped me realize that I need more gene cards to add variety to the game. Currently, I have a little over 40, but this is somewhat limiting when building a deck for a specific bacteria. I’ve already made some cards that don’t strictly follow the current understanding of bacterial biology, so I might as well jump off the deep end. From now on, I will be putting anything that pops into my head into my gene card list. From there, all I have to do is wait a few decades for something similar to be found in an obscure bacteria off the coast of Taiwan.
That is all I have for this week, I hope to see you all again on the next blog post. I will now be returning to the abnormally toxic google project like the little extremophile, Chrysiogenes arsenatis I am. I have attached some photos of a game board and tiles for reference.
Good morrow, readers! My scriptwriting is finally starting to get underway!
Writing this script has been very fun, but it also comes with its challenges. I’ll describe some of the main things that I have to face below.
One, line length. Lines in anything production involving kids usually have to be kept pretty short. I thought I was doing pretty good until I stumbled upon a kids’ musical jukebox script in the drama room that I only assumed was for a spring production. I was quickly humbled; the lines in there were so short! I’ve spent some time now cutting unnecessary fluff and finding ways to make dialogue more straight-forward for kids to read. For some of the lines that are longer, it won’t hurt the kids if they want to paraphrase them! The same story will be told. Most of the bigger lines will be given to the main characters; a formula I’ve often seen in kids’ plays.
Second, stage directions. To me, I know exactly how this scene should play out. I feel like it’s common sense, so writing out stage directions feels annoying to me. However, it is necessary especially for any production, so I have to add in every entrance and exit and any specific movement in the scene that I want to happen. The stage directions aren’t too strict though. In fact, some of them do allow for that experimentation that I was discussing for the kids to have. One of the stage directions in Ancient Greece is just for whoever plays Xerxes to insert a dance move of their choice! What dance move would you insert?
Three, comedy. This may be the weirdest issue, but I want my musical to have some funny moments. I’ve been trying to add some quips and jokes, but I’m worried the kids who read it won’t get it. I’ve decided to roll with it though, and there’s some pretty hilarious moments! I think props also help with the comedic aspect. From Hamlet making a pun of “bone-afide” genius while holding up a skull to Dionysus carrying around a frog and ribbiting in reference to the Greek comedy. Also, in a production with kids, some things are funny for the audience because… well they’re kids. In Annie Kids, you could hear a little giggle from the audience when a pint-sized Daddy Warbucks walked onto the stage or when a kindergarten Sandy started bark-singing during tomorrow. I’m sure just the nature of this will help get some laughs from the audience.
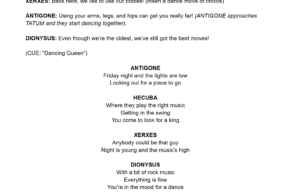
These challenges aside, scriptwriting is really fun once I get into the groove of it! I’ll put some previews to a few of the scenes below. Let me know what you think!
Welcome back everyone! I’ve been pushing forward with the third chapter’s storyboard as the final weeks count down. In the next two weeks, I’m aiming to push my limit for how many pages I can sketch. Here’s what’s happened this week so far:
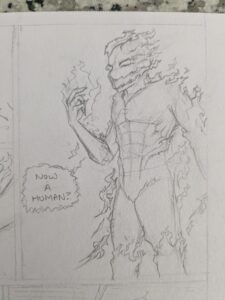
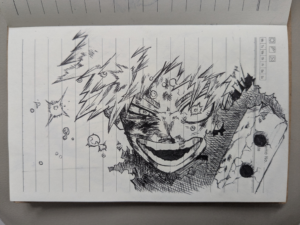
Compared to the previous chapters, I’ve been emphasizing more visual and sound effects. Now that I’ve actually introduced the superpowers, there will be more action-packed conflicts with special effects like fire, lightning, smoke clouds, explosions, and others. Along with this, I’m paying more attention to shading and motion lines in this chapter, especially to depict my characters’ emotional depth. And since every hero has a villain, here’s my design for one of the main antagonists of the story, with some of these visual effects:
As for more character profiles, I created two more thus far: Tonitrus and Atlas (this Atlas is his own character, not the same one as Marcus’s alter-ego). Compared to the other figures I designed, I went above and beyond with creating their personalities and clothing (one of them is 156 million years old); however, their names are what I want to focus on here. I derived these characters from characters in Greek mythology, but I used words from Latin to create their names. Tonitrus is based on Zeus, the ruler of Mount Olympus and the god of lightning, and Atlas is based on the Titan punished by carrying the world on his shoulders. Here they are so everyone can see for themselves: Chapter 3 Characters 1.
The comic book cover art will get its own update next week, but I’ve begun developing ideas for what to include in it. I’ve been watching some of a documentary of Marvel Comics creator Stan Lee’s comic book drawing, in which he explains how to catch the reader’s attention to the cover. Once I’ve designed a rough draft of where to place the elements of my story, such as the characters, background, main conflict, and most importantly the title, I will share it with everyone. Until then, see you guys next week!
As I continue to work on refining my draft, I said in my last post that I would show and explain Unit 2. Below are images of how the unit looks in my google document. As a reminder, if you are unable to see the images due to them being blurry, click here to go to the actual google document.
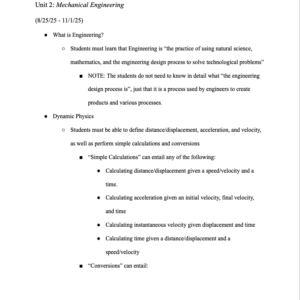
Unit 2, which I titled “Mechanical Engineering”, is one of the longer units, as you can see in the images below
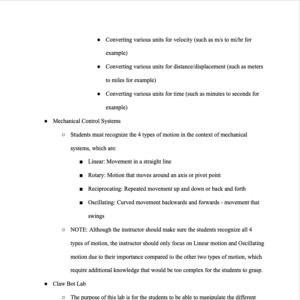
This first image shows the first few topics covered in this unit. As it is assumed for the purposes of this class that nobody has prior experience with engineering, we start by defining what engineering even is. Spread throughout this unit are several notes, which I stylized as “NOTE:”. These notes are to make sure the instructor doesn’t delve into too many specific details. For example, in the note you can see in the image above, it mentions how the students don’t need to know what the “engineering design process” is in detail. Next, as you can see in the image, basic dynamic physics concepts are covered. This topic includes several simple calculations students will need to be able to do, as well as several basic unit conversions, which you can see in this image:
Further down the image, you can see the next topic is mechanical control systems, which is just a fancy way of saying the different ways a robot or part of a robot can move. Notice the note here as well. It says to focus mainly on the linear motion and oscillating motion. Linear motion due to it being simple as well necessary to understand other types of motion, as well as oscillating, due to the nature of wheel movements, and how most robots have wheels that they move on. Although most robots can move in a linear motion, there is also oscillating movement present.
This final image shows the end of the unit, which wraps up in the students first hands – on lab, this one focusing on the mechanics of movement. Although the lab says to use the VALINNY Robot Kit, this may or may not be the final robot that is actually used. I am currently exploring an alternative suggested to me by my project advisor, namely the Elegoo Smart Robot Car V4 which I have been told has more capabilities that would be useful for teaching mechanics compared to the VALINNY Robot. Again, I am still exploring this possibility, so I am open to any suggestions anyone might have. Either way, the kit used will have to be able to clearly show some aspect of mechanics we covered throughout the unit.
Hello everybody, and welcome to another blog post with the one and only Nick Asrari. For those of you wondering—that’s how I envision my morning motivation in front of the mirror. I guess you could say that’s where my slightly horrifying, possibly admirable podcasting persona began, but I like to think I’ve found my voice through experience. I don’t remember if I’ve mentioned this in previous posts, but sometimes hearing my voice when I playback the audio recording can get a little frustrating. I always think to myself, is that how I really sound?
Editing:
Over the past week, I’ve been editing more episodes. The editing process has become more efficient with each one I review. However, some recordings are tougher to work with than others. I’ve found that the slower I or my guest speaks, the easier it is to pinpoint specific edits. When the conversation moves quickly, it’s harder for me to make smooth edits, so I usually end up leaving those parts alone. I guess you could say those parts made the cut… get it?
Promotion:
The video I planned to record to promote my podcast has been postponed to later this week. Once I finalize my episode release schedule, I’ll start planning how and when to promote the podcast.
Research and Reflection:
While researching how to promote my podcast, I came across some eye-opening data and statistics about career exploration for high school students. I read several articles highlighting how little exposure most high schoolers get to potential careers. A survey conducted by American Student Assistance (ASA) in 2021 revealed that 68% of high schoolers believe that “high schools should encourage students to develop a plan for their education.”
Additionally, I found some compelling insights on Education Week. According to a 2024 Gallup survey of 8,500 middle and high school students in New Hampshire, “58 percent of the New Hampshire students reported learning about jobs or careers through classroom activities this year. Just 17 percent reported going on a job shadow, 13 percent reported having an internship, and 11 percent reported participating in a registered apprenticeship.”
What caught me off guard was that only 13% of students reported having an internship. In college, internships are one of the main ways students land jobs after graduation. Even though this study was conducted in just one state, I think that percentage should be much higher.
Reading these articles helped me realize the potential my podcast has to support high school students. With social media becoming one of the biggest influences on their decision-making, I hope my podcast can help uncover the unknowns surrounding different careers—so students can start building their future paths earlier in life. I also recommend reading the articles I referenced above. They are quite interesting. Well, to me anyway.
Gratitude:
A few students and adults have already come up to me and said they’re excited to hear the podcast once it’s released. While I had considered its potential impact before starting this senior project, I want to dedicate a part of this blog to everyone who has supported me along the way. I truly appreciate everyone who’s taken the time to read my posts. The support I’ve received has been incredibly motivating and more than I ever could have expected—it’s pushing me to get this podcast ready for release as soon as possible.
To close things out, let’s hear from one of my hypothetical best friends, Phineas Flynn from the show Phineas and Fern:
“The only thing impossible is impossibility.” – Phineas Flynn