Week 7: One Pointe at a Time
Katie b -
Last Friday, my dad managed to land me a small meeting with one of his coworkers at Gore who knows all the tips and tricks of SOLIDWORKS. I brought in my laptop and the Virtisse HH shank I had removed from my shoe a few weeks ago, hoping he could guide me on the best methods for creating my new design. He was extremely helpful.
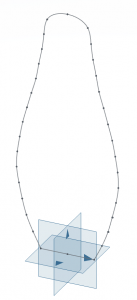
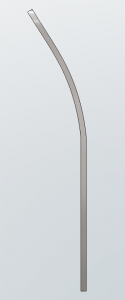
The first suggestion he had to mimic the 2D shape of a shank was to create a series of points with precise x and y coordinates in relation to the origin. I used a digital caliber to measure the width of the Virtisse shank starting at the bottom and moving up 1cm at a time.

At this stage, we needed to connect the dots to form a closed shape that could be extruded into a 3D solid. I had just finished carefully measuring and entering all 18 points when, as I switched to the line tool, the server suddenly refreshed. When the page reloaded, all of my points were gone. 🙄 It was incredibly frustrating. I was back to square one. Thankfully, I had written down all the measurements, so I was able to re-enter everything fairly quickly. This time, I made sure to hit the save button before switching tools. The server refreshed again nearly giving me a heart attack, but this time the points had saved. Yay!
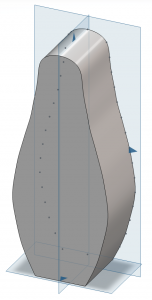
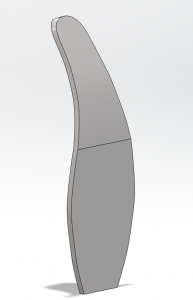
If I wanted the shank to be completely flat, we could’ve stopped here. However, I am determined to make a pre-arched shank. We rotated the solid to view it from the side. Now, we could create another series of points to outline the curve of my pointed foot.

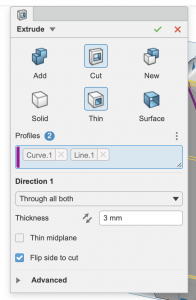
Next, it was time to carve this curve into the extruded solid. To do this we used a tool called “extrude cut.” We selected the outlined curve as the profile to cut and chose a thickness of 3mm. Voila! My new shank was created.
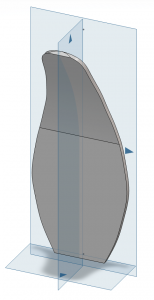
I am so happy to have finally conquered SOLIDWORKS and completed a final design! For now, I have decided not to include the slim, secondary shank I mentioned in my Week 5 blog post. I believe that any plastic or synthetic material I choose will likely be much stiffer than traditional shank materials, so leaving out the second piece should help prevent the shoe from becoming overly rigid. Looking ahead to next week, I will be running simulations on my design to test how it performs under different conditions. Depending on the results, I may reconsider the secondary piece—but for now, I am feeling confident about this direction.
Comments:
All viewpoints are welcome but profane, threatening, disrespectful, or harassing comments will not be tolerated and are subject to moderation up to, and including, full deletion.