Week 10 – Show of Hands
John W -
And just like that, it’s week 10 and the senior project is over. This week is going to have some progress (mostly finishing touches and adding the thumb), but it’s also going to have a lot of information about my final project (including the code, budgeting, etc.)
I started off the week by cleaning up my code and relevant comments explaining the various functions and variables I implemented. The code can be accessed at this GitHub repository (if you aren’t aware, GitHub is a website that allows for the open-source sharing and collaborative development of code)
https://github.com/theparakeetiscool/Robotic-Hand—Senior-Project
Below is a photo of the circuit (very messy) and a schematic, both for viewing and recreation purposes (I would like to preface this with the fact that this schematic is terrible; I have minimal experience making schematics and it may not be fully accurate). It does not include the thumb wires, but it’s pretty easy to just add that.
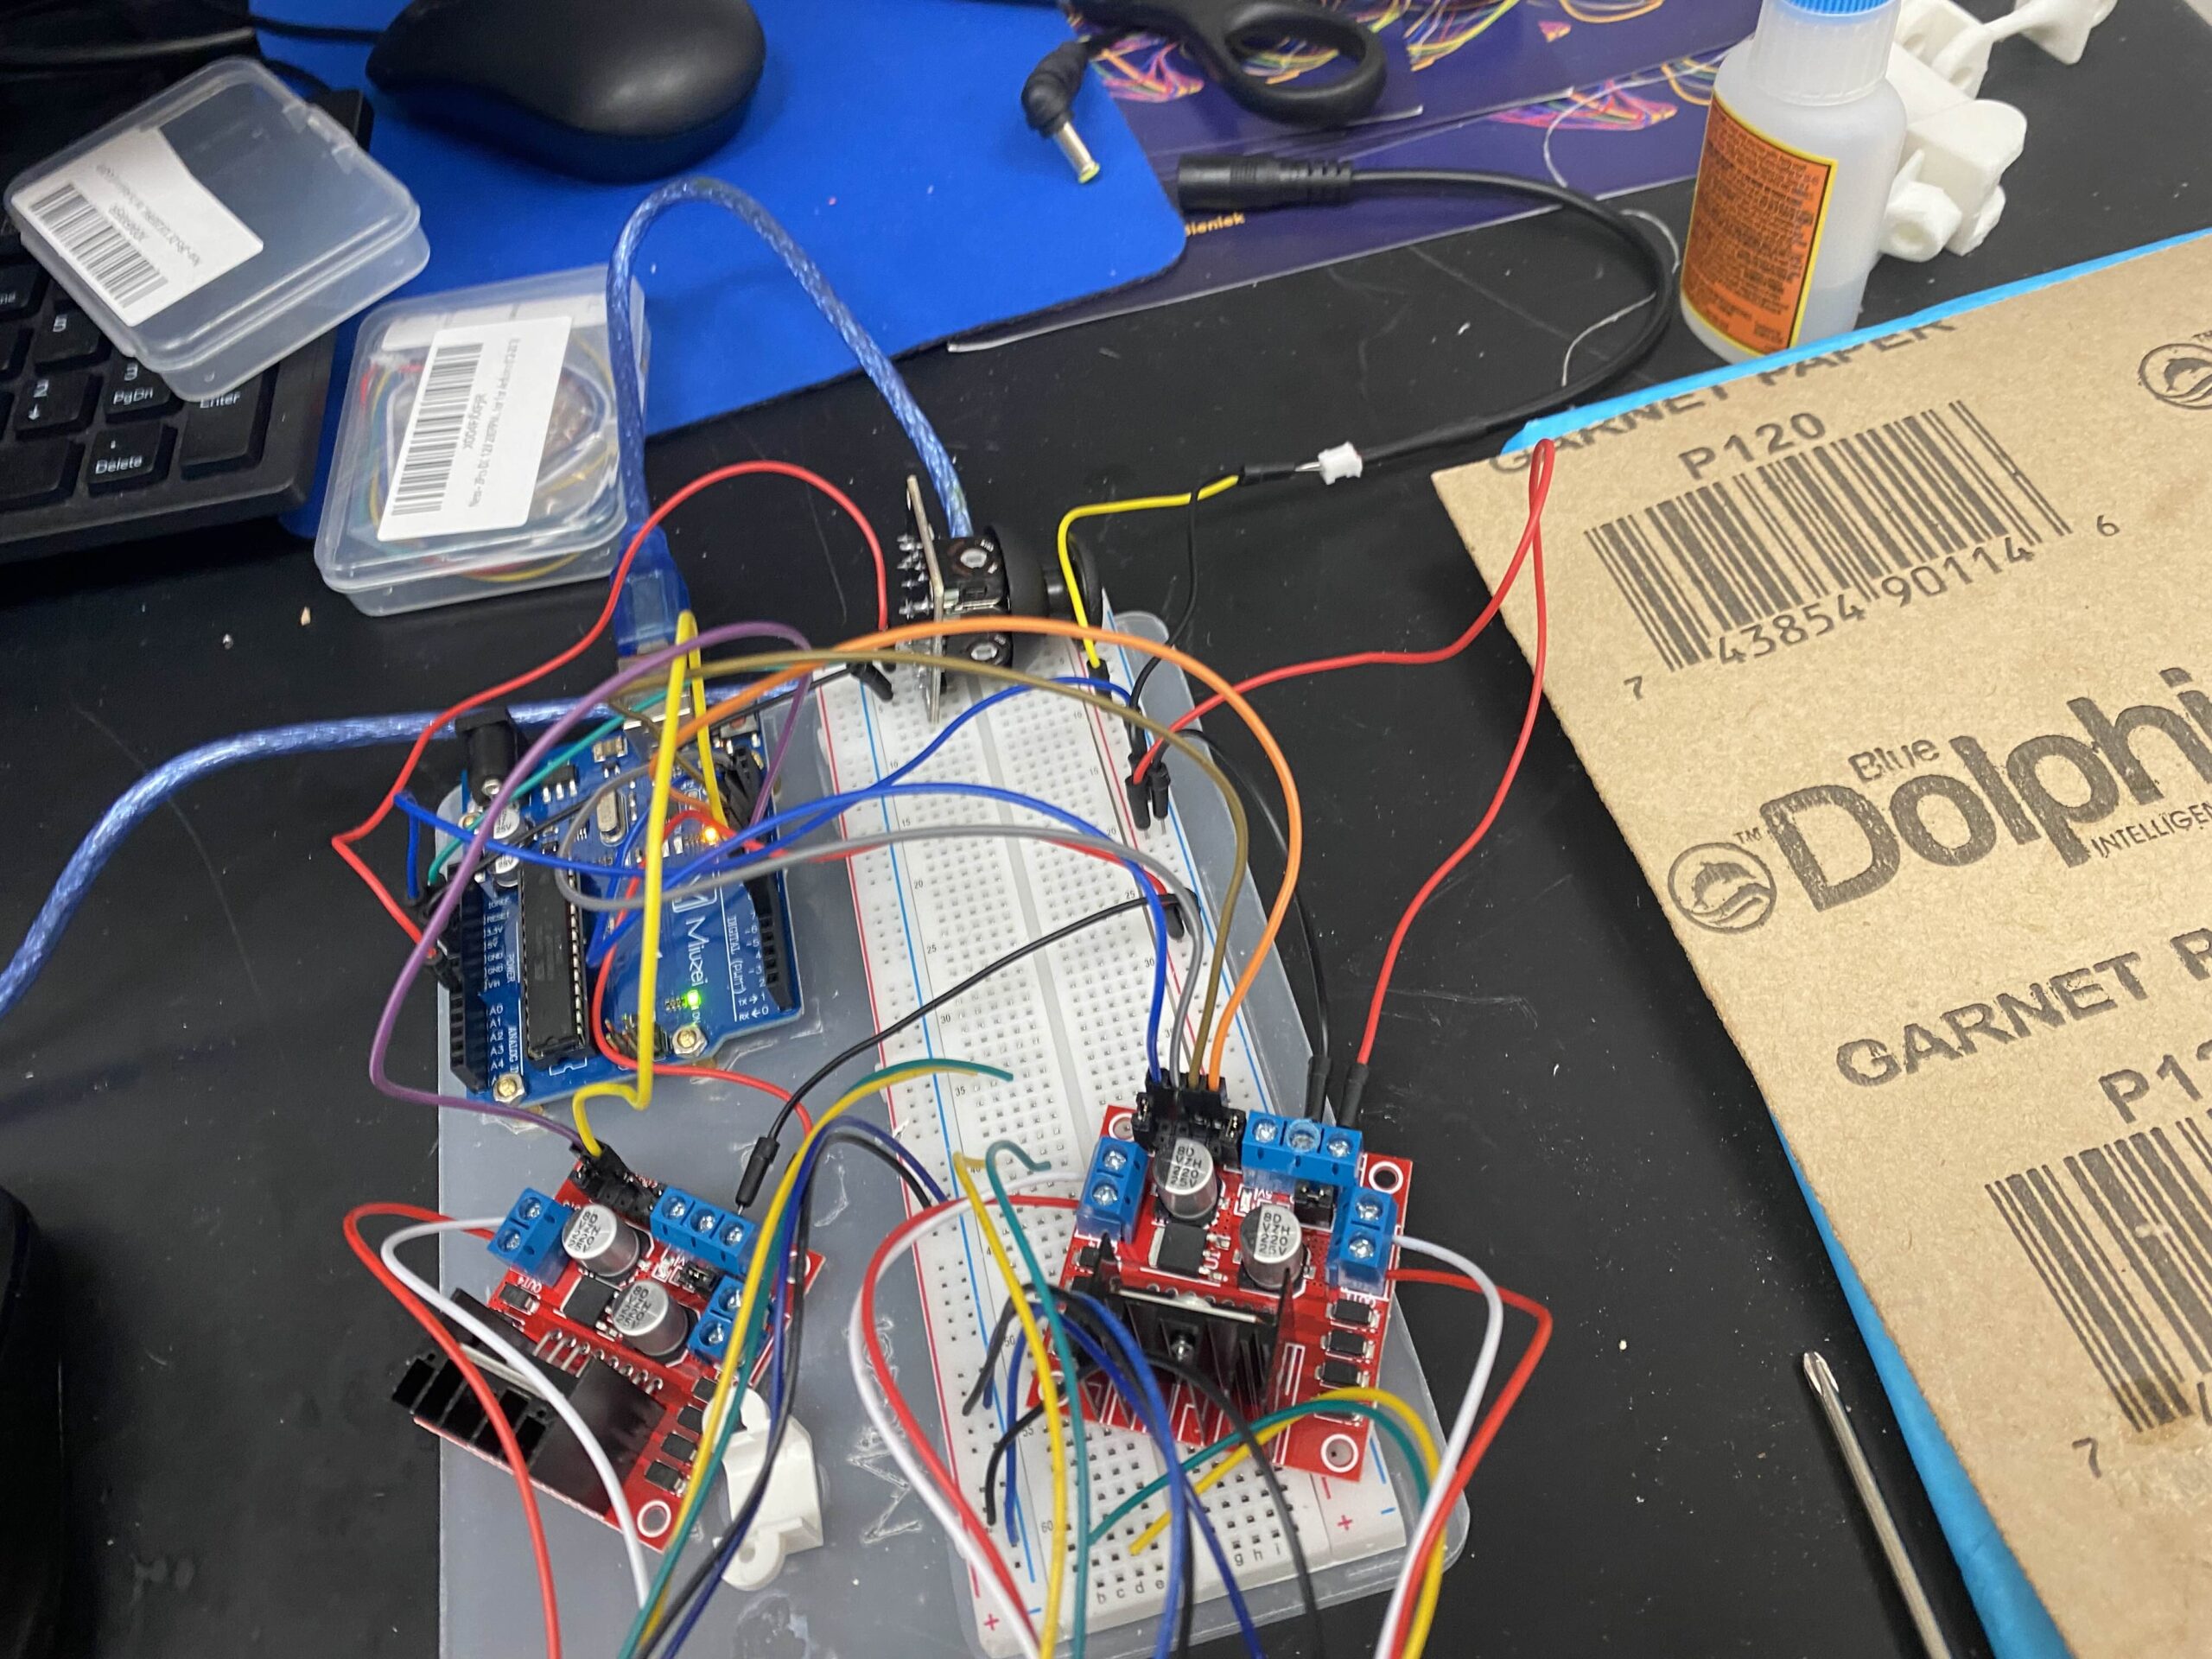
I realized that I had made an oversite: I did not have a motor driver for the 5th motor that I would use to power the thumb module. Normally, I would order another motor driver but I did not have enough time. I decided that I would use a transistor to drive the motor in one direction, and then manually reset the motor by hand. This is not an optimal solution, but it will still allow for good grip without having to panic order a motor driver. In this case, the transistor is going to take a digital input from the arduino in order to determine whether or not it will allow current to flow to the motor.
I set up the transistor to control the motor and wired it to an analog pin (fun fact: you can use analog pins like digital pins; since the max analog value is the same as a “1” from a digital pin). The thumb worked beautifully, and thus my hand is completed!
Here’s a photo of the hand, along with a video demonstration (in the form of a .mov file)

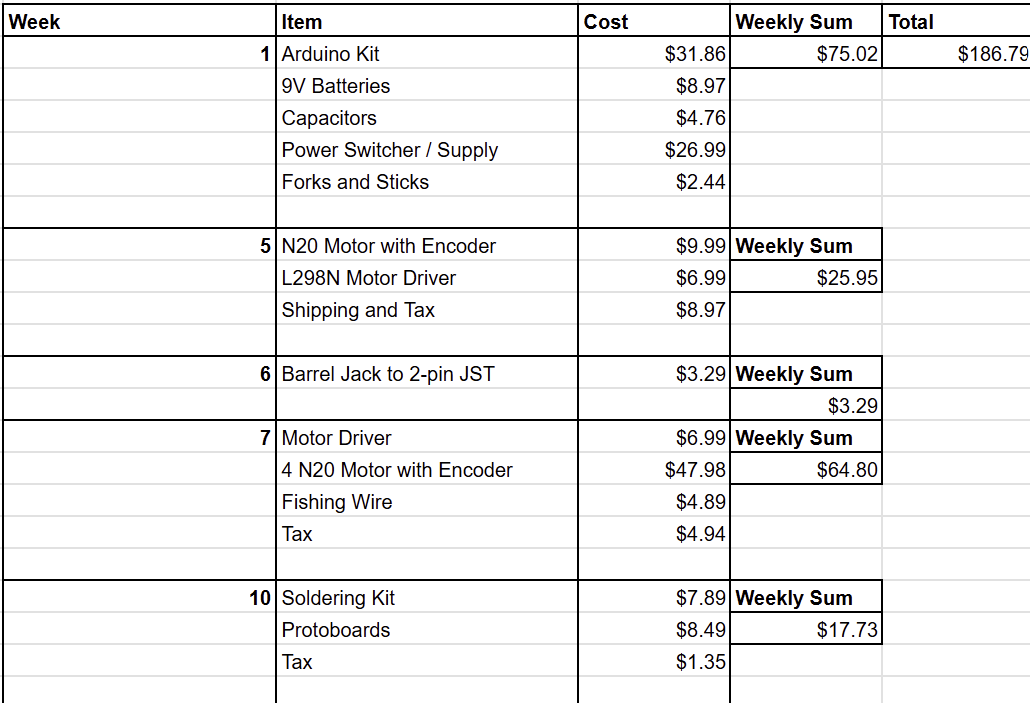
One of the most important aspects of this project has been the economics, and so below I have shown both the total amount of money spent on this project. Some of these expenditures are not necessary and were only used in prototyping, but most of the cost went into the final product. Cost of filament is not included because it would end up being very minor (<$10). Of course, this cost does not include access to a 3d printer, which my lab graciously provided to me free of charge, but there exist several free / low cost printing alternatives like university makerspaces and online printing services.
Note: you could likely make this project for less than $160 if you removed the extraneous purchases and bought the cheapest power supply / Arduino you found online; but I had to often spend more money due to the time constraints of this project.
And with that, my senior project is done. If you’d like to see the hand in action I’ll be giving a demonstration during my final presentation.
It’s been a blast!