Week 4: I’m an engineer now!
Sumin S -
Hey guys! Welcome back to Week 4 of my Senior Project blog! It’s been a super exciting and productive week in the lab, and I’m happy to share some progress with you all. This week, I focused on taking a big step forward in my project. I officially designed the spin coder and even sketched out the basic structure of the device! It is beginning to feel like I am an actual engineer!
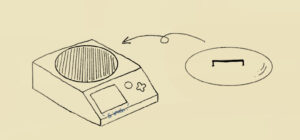
For the design of my spin coder, or centrifugation spinner, I decided to combine the microscope camera directly with the body of the spin coder. I thought this would be the most efficient and compact way to capture results instantly, right after the centrifugation process. Instead of moving the sample from the spinner to a separate microscope—which could easily disturb the sample by muddying the boundary between PEG and DEX—this setup will allow the camera to catch what’s happening in the instant. The main body of the spin coder will support the motor and spinning platform, while the microscope camera will be positioned directly above it. I’ve drawn a basic structural sketch that lays out how all the parts will come together. It’s a pretty early draft, but I’m excited to see how it will evolve!
To make the camera adaptable, I’m planning to attach it to a telescoping pole, which will connect to the main body of the spin coder. This way, I can easily adjust the height of the camera depending on the type or size of the sample I’m working with. Some samples might need to be viewed up close, while others might require a wider field of view, so having this vertical flexibility will make it much more versatile. I also think this setup will make it easier to adjust the focus when trying to capture very small particles or subtle separations. So, the camera can move and adjust based on what I need at the moment. This design choice is not only functional but also helps the overall look of the spin coder stay clean and organized.

Another fun feature I’m planning to add is a color sensor that specifically detects the color red. This sensor will be placed near the spinning platform and programmed to recognize a red mark placed on the sample holder. Once it detects that red mark, the system will automatically stop the spin at that specific position. The goal here is to make sure the camera always captures the sample from the exact same angle and orientation. This will help keep the image results consistent and easy to compare. I think it’s a simple but efficient way to make the whole process more accurate!
While brainstorming the design this week, I came across an article that gave me some really helpful inspiration. It was called “The Centrifuge Camera Channel: Will It Separate?” and it talked about how a camera can be built into a centrifuge to track the movement and separation of different materials in real time. The article discussed a clever setup where a camera is aligned with a spinning channel inside the centrifuge. As particles move during spinning, the camera captures the separation process directly, rather than waiting until after everything has stopped. This approach helps researchers better understand how fluids and particles behave under centrifugal force (Micrograph Stories, 2023).
One of the key ideas I took away from the article was the value of real-time visualization. Instead of guessing what happens inside the tube while it’s spinning, the built-in camera gives a live window into the process. That concept really inspired my decision to embed a microscope camera into my own spin coder design—especially since my project goal is to capture separation results instantly!
On Friday, I had the opportunity to give a presentation in front of the lab members about everything I’ve worked on over the past four weeks. It was a little nerve-wracking at first, but overall it was such a great experience! I walked everyone through my journey so far: from learning about the research project and understanding the cell separation process to designing the spin coder and explaining the thought process behind each design choice. I talked about why I chose to combine the microscope camera with the spinner, how the telescoping pole will help with adjustability, and the purpose of the red color sensor. Everyone was supportive and asked thoughtful questions with feedback, which helped me think more deeply about the technical side of my design. It felt really rewarding to be able to share my ideas and get feedback from people who are working in the field!

That’s all for this week! I’ll be working on putting the design into the 3D Printing software OnShape starting next week, and I’m so excited to see how everything turns out. Thanks again for keeping up with my Senior Project journey, and I hope you enjoyed this week’s update!
Reference
Micrograph Stories. (2023, February 16). The centrifuge camera channel: Will it separate? Medium. https://medium.com/micrograph-stories/the-centrifuge-camera-channel-will-it-separate-252e99b8f0b9
Comments:
All viewpoints are welcome but profane, threatening, disrespectful, or harassing comments will not be tolerated and are subject to moderation up to, and including, full deletion.