WEEK NINE: Post-Mortem Examination (Autopsy)
Hi Peeps!!
In this week’s blog, I will be going in-depth over a post-mortem examination. If you do not feel comfortable with reading any of this, it is fine you can check in next week!
This week was very fascinating. I went into the office at the same time I usually do which is 7 A.M. which means I typically wake up around 2:40 A.M. to get ready to leave at around 3:30 A.M. to arrive at the office at about 6:30 A.M. I have been doing this process every week for the past 9 weeks. Most people are shocked hearing the routine and reply that that is something they could never do and wonder how I do it. The answer is I really enjoy what I am doing. I am always learning new things, things that I have been intrigued by since I was young. I am satisfied with everything I have been able to do, and all the fascinating opportunities that I have been given. One of the opportunities that I have been given is to observe a post-mortem examination multiple times and now I have the opportunity to share this with you the reader.
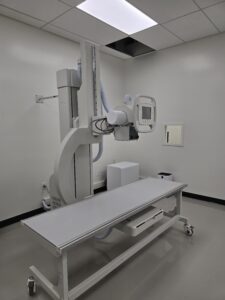
As I have said previously, I arrive at the office at around 7 A.M. to be able to observe the preparation that happens beforehand and change into scrubs. First, they review any documents or records about the case. If the forensic pathologist requests X-rays for a case they will get them done around this time (Exams typically begin around 9 A.M.). The X-rays are taken through the body bag before the seal is broken. This is because when the body is received, it is in a sealed body bag. This is done to keep any evidence from the body inside the bag the way they received it to take records of it. For example, if the seal was broken before, evidence could be lost which can later cause problems. The X-rays are then taken in sections, for example, the upper arm. abdomen, lower leg. This is done to get a good photograph of the specific section to obtain details of it.
Before anything else occurs, they will put on PPE (Personal Protection Equipment). Then they bring the deceased into the morgue suite. Typically, there is a seal to the body bag which keeps it closed which I have referred to previously. The seal is a serial-numbered plastic ID tag. The seal will have an identifying number and/or it’ll be written down on the body bag alongside a name. This is to help identify who the decedent is. After confirming the number the seal is broken and the examination begins. They will always perform an external examination. This entails entering the decedent’s information such as stature, weight, eye and hair color, clothing type, and plenty of other things into a website that they utilize. But if they have scene photos of the decedent they can enter any clothing, jewelry, hair color, and sometimes eye color into the website before the seal is broken. Sometimes during this time, they will take blood samples but other times they will take them during the examination it just depends. Keep in mind the doctors will review the cases beforehand and they will determine if it will be an external, full, and limited examination. They will be making the determination based on the case’s circumstances and what they believe is best.
Just as a review of an external examination, is the examination of how the body looks externally. This will be performed in any case. The doctor will go around the table where the deceased is and write down on a chart any external findings they found. This can include tattoos, scars, medical equipment, and many other things that could be seen externally. From here they document any item on the person such as the color of clothing, the type of clothing, jewelry, anything within the pockets, eye color, hair color, and height. They will also photograph what the decedent is like in the body bag. After documenting the body the way they are within the body bag they will begin to undress the decedent and put them onto the autopsy table. The doctor will again begin writing down any external findings, the forensic technicians will also during this time be cleaning the body especially if they have any dirt, blood, etc… This is to be able to determine exactly what is an injury, scar, etc… and not mistake it with something that isn’t. At this point, the technician will also photograph the body for record keeping. When the doctor is done examining the posterior of the decedent. They will turn the body around and do the same external examination process they did on the posterior side but now on the anterior of the body.
If it were just an external examination they would put them back into the body bag, close it, and take them back into the morgue freezer once they have taken any blood, vitreous samples, or fingerprints they needed. What I am about to detail in the couple next of paragraphs is the process they do when it is a Full and limited examination.
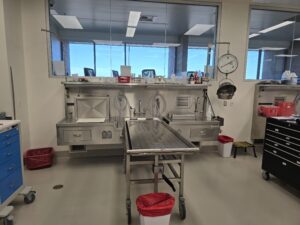
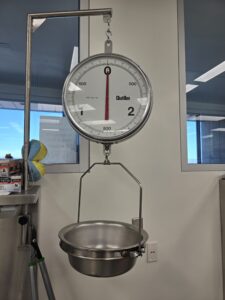
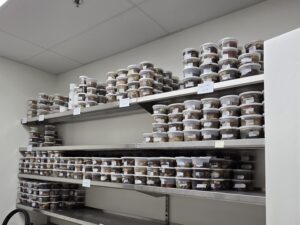
If it is a Full autopsy they will begin prepping the body for the internal examination. They will lift the upper part of the body and place a “head block” underneath the body directly under where the sternum is. This is to have easier access to the body cavity. From here on either the doctor or the forensic technician will begin the Y-incision. The Y-incision is an incision that is made from the shoulders where these incisions later meet at the sternum and go down to the abdomen making Y-shaped incisions. Then they proceed by using a scalpel to separate the fat and the muscle to get the skin to open. The Forensic Pathologist will then examine the ribs to see if there is any trauma present to them. Once the Forensic Pathologist gives the green light to move on the Forensic technician will get the rib cutter to cut the ribs. They use this tool to cut the ribs to be able to access and view the other organs better. While cutting the ribs the forensic technician will cut a small piece of rib for the forensic pathologist to be able to put into the gross tissue jar. Once done with removing the ribs the forensic pathologist then examines how the organs look. The forensic technician then checks to see if the appendix, gallbladder, uterus, and ovaries are present and they will document this. From this step on they will begin removing the organs each doctor has different methods they can use which I can go more in-depth in next week’s blog. Once an organ is removed they will weigh it and then begin examining it and dissecting it. The organs I have seen that are dissected are the heart, brain, liver, kidneys, and lungs. The forensic pathologist will examine and dissect chest, abdominal, and pelvic organs. They examine the organs and dissect them to see if there are any abnormalities, and if abnormalities are present and the forensic pathologist wants to record it they will document it and take pictures of it if requested. Also during this time they will be taking samples of the organ and saving it in a gross tissue jar that is filled with formaldehyde solution. This is to preserve it in case they need to review a case later on but there are also plenty of other reasons that may require re-examination. During this time too they will be taking blood samples. From inside the body cavity, they can take femoral blood, if they can’t retrieve any they then move on to cardiac. They typically try to get femoral first before getting subclavian or cardiac since it is in the peripheral causing it to be more accurate when testing at toxicology. From here since it is a full autopsy they will move on to the head.
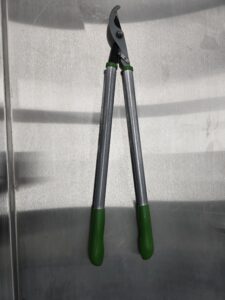
For doing the head autopsy for both limited and full examinations they will separate the decedent’s hair (if any is present) into two sections so the middle part of the head skin is exposed, then they proceed to get a scalpel and make an incision that runs from the lower part of both ears. After the incision is made they will use a tool called skull breaker to pull the skin back for the cranium to be exposed. From here they will interchange the skull breaker with the scalpel to separate the skin and other underlying tissue. Once the skin from either side of the incision is separated and folded back. The doctor will come over and check if there are any fractures or abnormalities. After all this is done they will get the bone saw. Every time I’ve seen this process I would see how the Forensic technician or even an intern would do this step with much ease. I was allowed to use the bone saw to do the head on a case. I thought it was going to be easy since they made it seem very easy. I was wrong, it was harder than it looked, but also keep in mind it was my very first time with much more practice it would become easier. I say it was hard doing this step since I did not know how deep I could go before cutting the brain as well as I was new to holding the bone saw. When using the bone saw you want to go a few inches behind the brow bone to start making a C-shaped cut, and connect this with another C-shaped cut from a few inches before the bottom of the head. After these cuts are made they utilize the skull breaker again to detach the Skull that was cut. The forensic pathologist then comes and examines the brain the way it is to determine if there are any traumas or abnormalities. Once given the green light they begin removing the brain. I was able to do this part but yet again I struggled, I struggled to physically remove it since you have to do certain specific cuts to remove the brain entirely. Also, it is very hard in my opinion to do since you cannot add too much pressure while holding the brain because if you do you could potentially put a hole into it and that is frowned upon since when the doctor begins examining it could obstruct the accuracy of how it was beforehand. After removing the brain they again weigh it and then examine and dissect it. While the doctor does this either the forensic technician or an intern will begin removing the dura mater. The dura mater is a tough outer layer of tissue that covers the brain and is closest to the skull. I have been given the opportunity to do this in several cases. The tools that are utilized are the dura strippers and the skull breaker. The skull breaker is used to lift the dura for the dura strippers to get a grip on it and begin pulling it off. Once the dura is removed the forensic pathologist will review if any fractures can now be seen. Then again either the forensic technician or intern will remove the pituitary gland, which again I have done multiple times. To do this step the tools that are utilized are dura strippers, scalpel, or sometimes scissors. The dura strippers, they will use it to break the bone (sella turcica) that covers the pituitary gland. When the bone is broken they will use the scalpel to basically cut and “scoop” out the gland. I have been able to use both the scalpel and scissors. I personally prefer the scalpel since it is easier for me since I have had plenty of practice with it compared to the scissors which I have only utilized once. After taking the pituitary gland out they will show it to the forensic pathologist and after getting the green light they will put it into the gross tissue jar.
If it was a full examination there would be a red biohazard bag in which they will be putting in all of the organs after examining and dissecting it. If it were to be a limited autopsy it would be a smaller red biohazard bag that will contain only the brain. After completing all of these steps it is time to close up the body cavity and/or head. I have also been given the opportunity to do this. I would say I have become faster and better at doing this step. So let me explain. Once they are finished someone either the forensic technician or an intern can close up. They will grab the red biohazard bag and close it by using a zip tie. From here they will pick up the bag and put it back into the empty body cavity. When they put it in there they will grab the chest plate that was cut out and put it on top of the red bag. Sometimes the bag will have air within, to get rid of it so it’s easier to close they use the same sewing needle to put small holes into the bag. Once that is done, it is time to close the skin. This step may sometimes be hard for example if there is more fat it is harder to keep everything close together in order to tie it, if it were to be one a decomposed body it would be a bit harder to prevent it from tearing apart. Once all of the sutures are done on the body cavity, then the head will also be closed. Once finished closing they will remove the head block and any other tools on the table, and proceed to wash and clean off any blood. Then they will bring over the table that has their corresponding body bag and transfer them onto it. At this point, if there are any more things left to take samples of such as sometimes they still need blood samples, vitreous samples, and/or fingerprints. Sometimes they will do the fingerprints before the autopsy, during the autopsy, or after it is whenever there is time and space to do so. Taking fingerprints is very important since it is one of the methods they use for identifying a person. So they will to the best of their ability take fingerprints of every person. For children under 5 years old, they will take footprints instead.
After that, they will take them back into the morgue freezer and continue with any other case if there are any.
Keep in mind some of these steps may change, such as if it were a homicide case they will collect any evidence that an agency is requesting. They separate the clothing into different categories into brown paper bags such as shoes, shirt, pants, etc… Sometimes some agencies require different samples that they need to collect from a specific case. Other than that the autopsy procedure is fairly the same.
In my previous blogs, I do go into more in-depth on certain topics such as toxicology, external findings, etc… I recommend you check those out again!
Thank you for reading! I hope you also find this fascinating!!
