Blinded by Shining Lights
Hello, Readers!
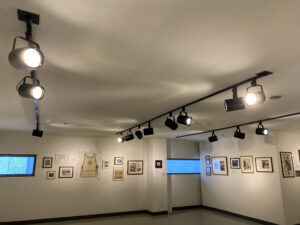
This week at the Phoenix Art Museum, my mentor and I worked on the finishing touches to the gallery. The first thing we dealt with was adjusting the lighting in the showroom. There are many newspaper clippings in the gallery, and they would deteriorate faster if there is lighting pointing directly at it. So, we had to move some of the lights, typically by pointing it more downwards or upwards so the focus of the light is away from the object yet the light still illuminates it. To achieve this, my mentor got up on a ladder and moved the lights around manually, while I provided support by holding the ladder and any tools she needed, as well as cheering her on. I also was in charge of looking at the lighting itself and telling my mentor if we needed to change the position of the lights again. Since the lights pointed in so many different directions at a variety of angles, I was blinded multiple times as I observed their positions.
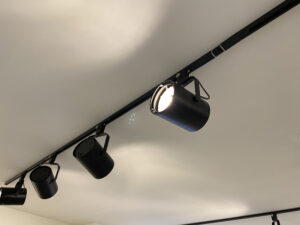
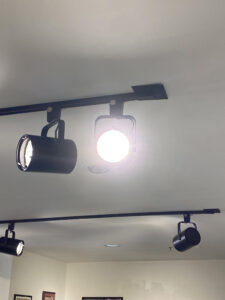
The lights in the showroom have three different rows where they can be mounted. Each row has a black bar that holds two tracks of copper wires that distribute the electrical current. On the light itself, there are two different components that mount the light: the metal knob and the metal lever. The metal knob controls two metal sheets that contract and expand in order to wedge its edges into the black track on the roof and hold the light in place. The lever controls a small, rotating plate with two exposed parts of copper. When the lever is pulled, the plate rotates, and the copper parts touch their respective wires in the track, completing the circuit and turning on the light.

After the work with the lighting was finished, I took a break from working on the gallery so I could do some more book repairs. I started off with the hinge repair method I learned last time as a review. I once again glued the tissue paper to patch up the hinge, and although it still did not look perfect, at least the book no longer looked like it would rip itself from the cover.
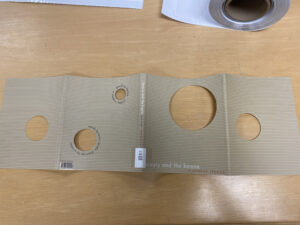
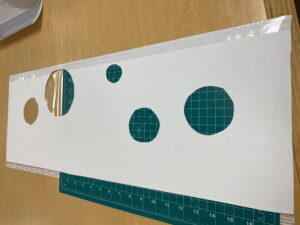
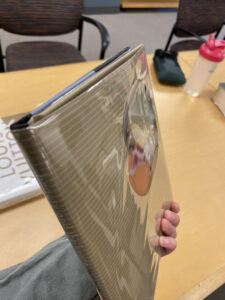
Then, my mentor taught me something new: making dust covers for books. The dust covers were simple to make because there was a big roll of pre-combined materials (a plastic cover, a paper backing, and an adhesive tab) that we used. Yet, it was still arduous and time-consuming because of the nature of the covers. Two of the dust covers we made needed to have holes cut out of the paper because the original covers had holes as an artistic choice. Because of the holes, it was hard to pull the cover tight, and the dust covers ended up looser than we would have liked it to be. My first time making a dust cover by myself took over 30 minutes, and I still was not satisfied with my results. I hope I will get the chance to practice this method more so I can get better at it.


Finally, I closed off the week by working on condition reports. This was my least favorite part of the week because I preferred to be working with my hands and physical objects rather than just typing and staring at a screen while my back ached from my bad posture. But, it is a necessary part of the process; even though the gallery is finished physically, the reports are as important as things like framing is. The condition report is a big google sheet I made that records the details of each object. I needed to write things like what type of object it is, what the measurements of the object are, what kind of frame it is in, what kind of matting is used, if any at all, what kind of condition it is currently in, etc. I had to go through and observe all the objects for any damage or signs of deterioration, and I recorded everything in great detail. Then, I had to take photographs to document the condition and add them to the report as well.

I tried to make it as fun as possible by adding dropdown menus with colorful choices, but the work was still strenuous. In addition to that, the lights were still as bright as the first day I worked with them, so my eyes were strained from both getting blinded by the showroom and using my laptop to write the reports. After the first two hours of condition reporting, the words on the screen started to blur, and I had to take a break by walking laps around the showroom.
A poem came to mind as my eyes were hurting:
Went to study preservation
When all of a sudden,
A spreadsheet invasion!
My eyes are not fine,
Blinded by bright lights
And increased screen time
At first, I came up with the title for this week’s blog post without a specific reference in mind, but then I realized it coincidentally matched the lyrics to “Ruby” by Woozi, a song where the narrator is dazzled by the beauty of a woman and her ruby-colored lips. I feel like my experience at the museum the past week was similar, except I got blinded by literal shining lights rather than metaphorical ones. The only ruby I got to see was my bloodshot eyes in the mirror after all that eye strain.
Next week, I will be taking time off from the museum for a late spring break, but the week after, I will return to working. I plan on finishing the condition report and also learning more about book repairs.
Comments:
All viewpoints are welcome but profane, threatening, disrespectful, or harassing comments will not be tolerated and are subject to moderation up to, and including, full deletion.