Week 4: Thin Sections
Liam k -
This blog post will hopefully be a short one. I ended up with a nasty stomach bug after spring break, and am still recovering 10 days later. Another blog post will be coming out tomorrow, which will hopefully be more interesting. Today, I want to talk a little more on the samples I am looking at, and the process to get them to a workable state.
Thin Section Basics
To start, the samples need to be collected, out in the field. This involves picking the right rock, and making sure it makes it back to the lab safe and sound. I’m not really involved in this process, but it’s pretty relevant to my project. Next, the rock needs to be cut down to a workable size with various saws and sandpapers. The thin-sections I am working on are about 1in x 0.5 in. After the rock is cut down slightly smaller than the slide, it can be epoxied on, and then it gets ground down to bout 30 microns (0.03mm). You now have a finished sample!
Carbon Coating
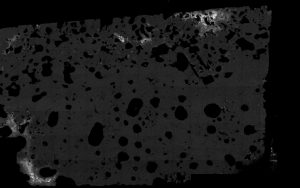
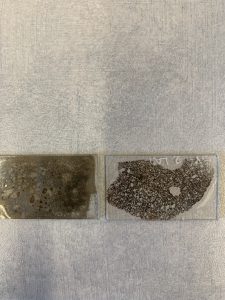
For a conventional microscope, these samples would work fine, but the electron microscope uses electrons (obviously) and it is important to not have any charge on the section. Charges show up as really bright white spots, which makes it hard to see the rocks. In the image it the right, there is some charging in the upper right. To counteract this, a 20-30 nanometer thin coating of carbon is applied. When I put my samples into the microscope, I also ground it to the stage with some tape. The carbon coating looks brown on the sample, and can be wiped off pretty easily, so I try to make sure to only touch the edges of each sample. In the other photo, you can see a carbon-coated sample on the left, and a normal one on the right. I’ve been putting tape on the bottom right corner, so you can see where it wiped the carbon away.
Comments:
All viewpoints are welcome but profane, threatening, disrespectful, or harassing comments will not be tolerated and are subject to moderation up to, and including, full deletion.